...
How to Attach a Document to a Student Application
- Log in to GW Passport (login instructions).
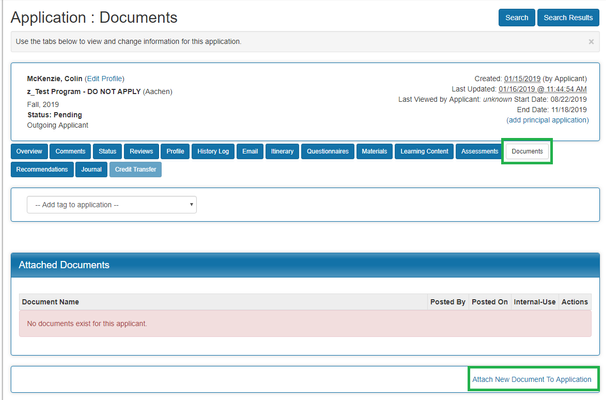
- Navigate to the student's application, e.g. via Applicants > Applicants > Search.
- Click on the Documents tab and then click Attach New Document to Application.
- When attaching a file:
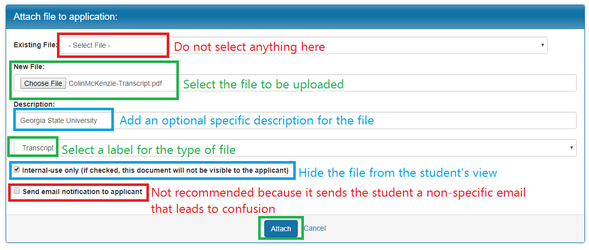
- Existing File: Do not select anything for Existing File.
- New File: Choose the file you want to upload from your computer.
- Description (optional): Add an optional specific description for the file. For example, if the transcript is not from GW, you could add the name of the school.
- Label: Select a label for the type of file. If you need a label that is not listed, contact oipadmin@gwu.edu to have it listed.
- Internal-use only: Checking this box will make the file only visible to administrators. Otherwise, when this box is unchecked, students will be able to view documents attached to their application.
- Send email notification to applicant: This is not recommended because the email students receive is very vague/generic and typically results in confusion for the student.
- Click Attach to upload your file.
- Uploaded files will be visible on the Documents tab. They will also be visible to the student applicant if the Internal-use only checkbox was left unchecked.
